Show Me Your Astavakrasana!
- Ashley St John

- Dec 31, 2014
- 3 min read
I remember my very first time trying Astavakrasana, or Eight Angle Pose. I was a big twisty, mess of a ball!
The mojority of my practice is at home, so as a beginner I would get myself amped to try fun & challenging poses, and get into them directly from what the picture looked like, and that way only. (Hello, crazy hard!)
I finally ventured into the inter-web to research on how to actually get into this chewy arm balance, and guess what? I actually got into it!
See, the thing about yoga is this: It surprises you! Think about it. Our (sometimes very judgmental) minds are constantly telling us what we can and can not do. It tells us things like, "That's too hard." & "I'm too tired, I'm not doing this." Yoga gives us a chance to be, breathe, and move our bodies in ways it's not used to moving. It lets our minds take a seat in the back & watch our body do magical things!
So, the moment my crooked, far from straight legs hugged my arm for dear life, and my booty rose juuuust barely off of the mat, as I arrived into my very first Astavakrasana - magic happened inside of me!
From that moment, as far as I was concerned, I could do whatever the hell I put my mind to! On the mat, but in real life too!
What I'm trying to say with all of this is --- you can too!
Show me your Astavakrasana in 7 steps:
Now, let me just add a little disclaimer here. This pose should really be done after your body is properly warmed up. It will not only prevent any strains, but it will help you slay this pose! I'm talking major hips/hammie opening, core strengthening, and of course arm strengthening (chaturanga pushups, here we come!)
1. Stretch yo' Hammie

Grab your left foot and stretch your leg towards straight, sit up straight and pull your knee towards your face to stretch your hamstring.
2. Rock-a-Bye Hip

Bring your lifted foot to the crook of your right elbow, and your lifted knee into the crook of your left elbow, as if you're cradling your shin. (Aw, cute =)) This will help stretch your hip - preparing it to open even more!
3. Backpack the Leg

Use your hands as pictured to simultaniously push your leg up & pack over your shoulder/upper arm. Squeeze your calf & shoulder together & squeeze your inner thighs!
4. Set Up & Squeeze

Prepare to set up for your Asta by squeezing the top leg and arm together to keep the leg in place, keep your core strong, and place your hand onto the floor.
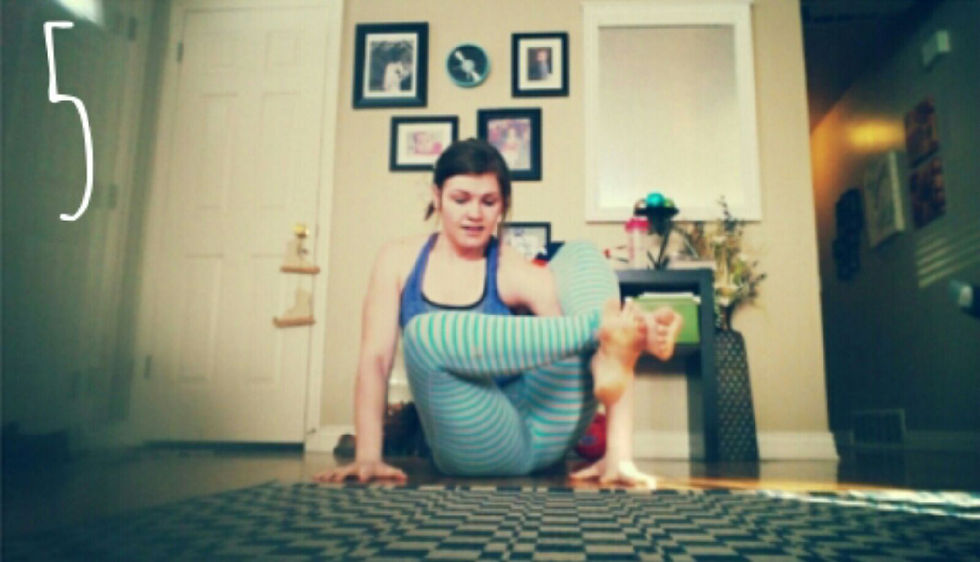
5. Hook It

Hook your feet - right foot goes on top of left foot, hook them together for stability. Squeeze your inner thighs together and place both palms flat on the floor - press down through palms & fingertips - preparing for lift off!
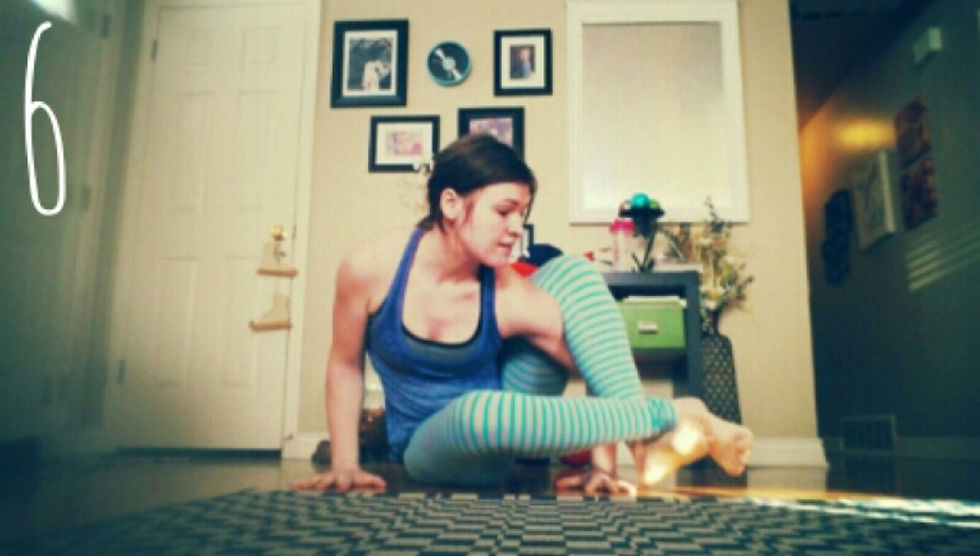
6. Lean With It

While squeezing your inner thighs towards each other, keeping your core strong, and palms pushing into the floor --- Start to lean forward into your Chaturanga-like arms. As you lean forwards, your booty may start to lift off the ground!
7. Asta-Ta-Da!

Squeeze inner thighs, core strong, chaturanga arms squeeze in, chest leans forward & stretch legs towards straight!
*Keep practicing! Sensation & screaming of the core can only mean one thing - You're getting there! So, don't give up if you don't get past aa specific step today.
You're rocking it!
xoxo
Ash


Comments